Docker Desktop Optimization Guide for Windows Developers
3/12/2026
Introduction
“Is your computer fan spinning like crazy again?”
Every time you open Docker Desktop, your computer starts gasping for air, memory usage skyrockets to 90%, and the CPU fan roars—this is probably the daily reality for many Windows developers.
Docker is indeed useful, but on Windows, it’s like an untamed beast. With default settings, it can consume half of your system’s resources, leaving other software trembling.
Today’s article will teach you step-by-step how to tame this beast. From resource limits to WSL2 integration, let’s make your Docker Desktop obedient and efficient.
What is Docker Desktop?
Simply put, Docker Desktop is the official desktop management tool from Docker. It packages Docker Engine, Docker CLI, Docker Compose, and other command-line tools into a graphical interface, making container management visual.
Previously, to view running containers, you had to type docker ps; now just click the interface. Want to check resource usage? The bottom status bar shows it in real-time.
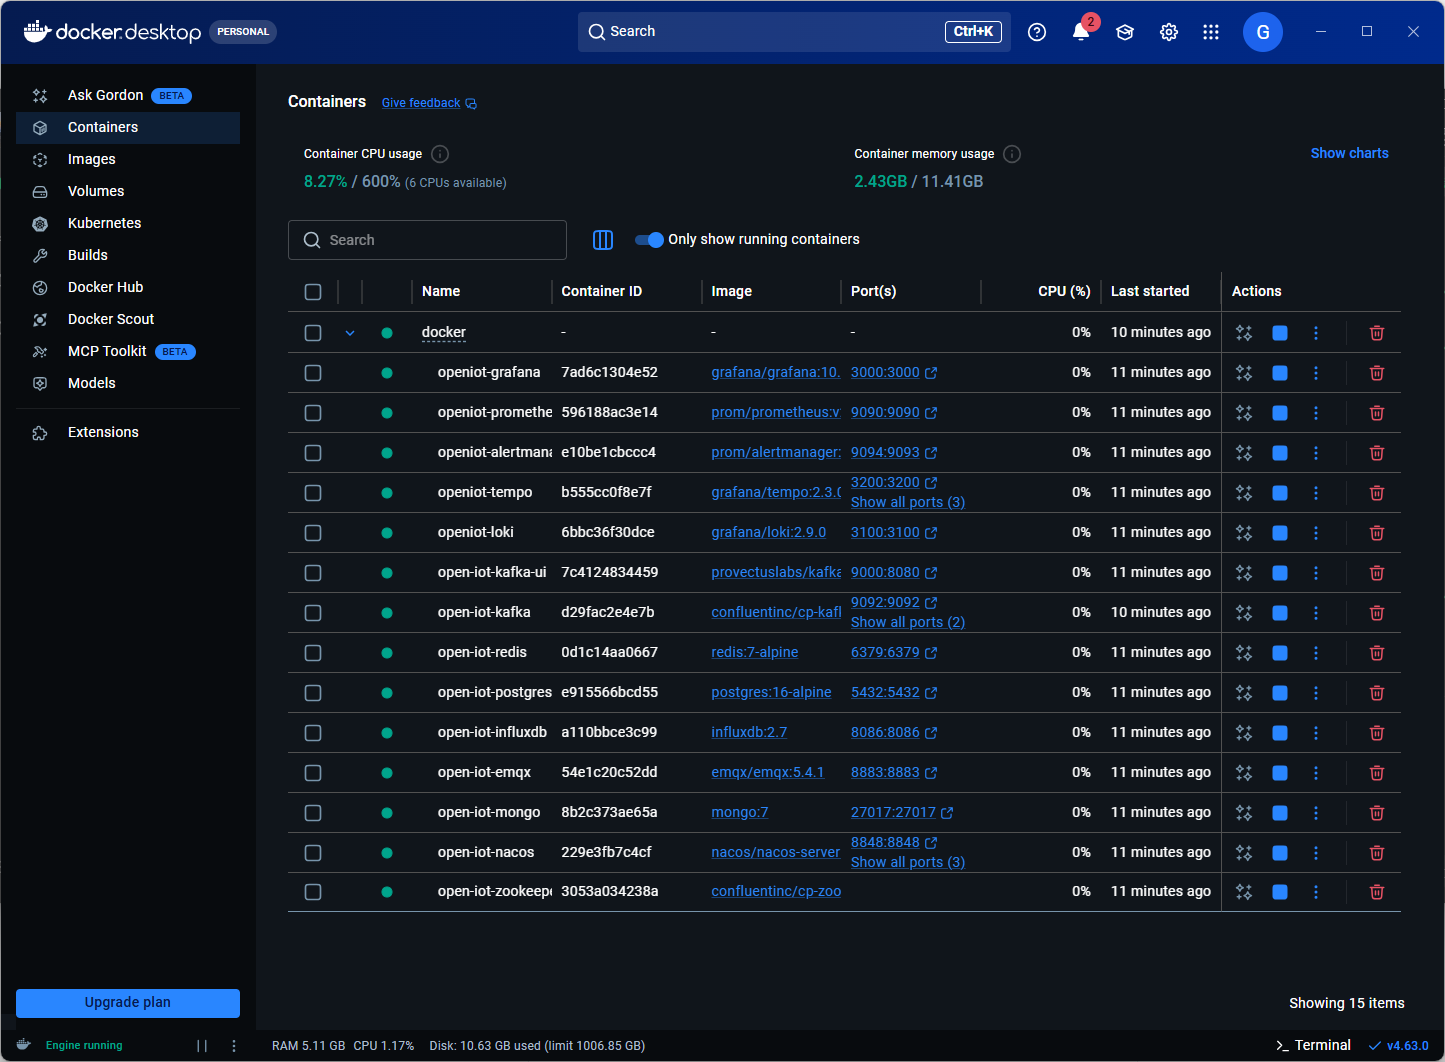
But here’s the problem—Docker Desktop on Windows uses WSL2 as the backend by default, and WSL2 defaults to consuming 50% of your system memory and all CPU cores. This leads to the “fan spinning” issue mentioned at the beginning.
Step 1: Know Your Hardware Configuration
Before optimizing, let’s understand what you’re working with. Open Windows Settings → System → System Information to check your hardware configuration.
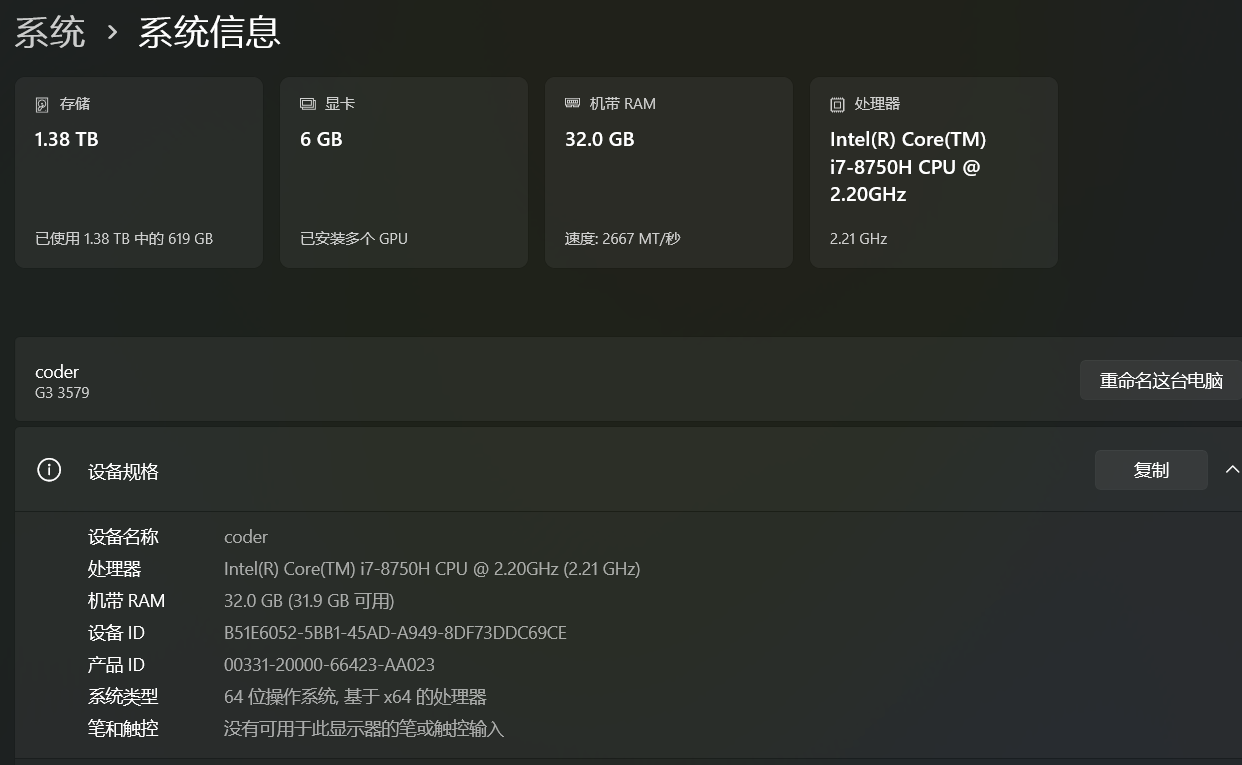
Taking my machine as an example:
- CPU: Intel i7-8750H, 6 cores 12 threads
- Memory: 32 GB
- Storage: 1.38 TB
Knowing these numbers helps you allocate resources to Docker reasonably.
Step 2: Create .wslconfig Configuration File
This is the most critical step!
The .wslconfig file doesn’t exist by default; you need to create it manually. It limits the resource ceiling that WSL2 (Docker Desktop’s backend) can use.
File Location
Create it in your Windows user directory:
C:\Users\YourUsername\.wslconfig
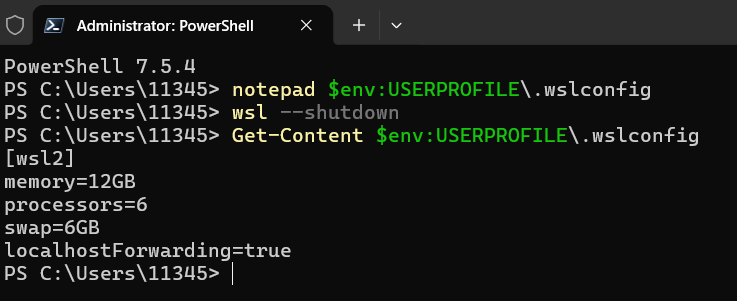
The quickest way is to use PowerShell to create it with one command:
notepad $env:USERPROFILE\.wslconfig
If the file doesn’t exist, Notepad will prompt you to create it—just click OK.
A Common Pitfall
If you create it with Notepad, it’s easy to end up with .wslconfig.txt, which is wrong! Make sure the extension is not .txt.
Recommended Configuration
Based on my hardware (32GB memory, 6-core CPU), I configure it like this:
[wsl2]
memory=12GB
processors=6
swap=6GB
localhostForwarding=true
Configuration Explanation:
memory=12GB: Limits WSL2 to use at most 12GB memory, leaving 20GB for the system and other softwareprocessors=6: Limits usage to 6 CPU coresswap=6GB: Sets 6GB swap spacelocalhostForwarding=true: Allows local port forwarding
You can adjust the values based on your hardware. Generally, it’s recommended to limit memory to 50%-60% of the total.
Apply the Configuration
After saving the file, execute:
wsl --shutdown
Then reopen Docker Desktop, and the new configuration will take effect.
Verify Configuration Success
Execute in PowerShell:
Get-Content $env:USERPROFILE\.wslconfig
If you can see the content normally, the file location and name are correct.
Step 3: Docker Desktop Resource Settings
Open Docker Desktop → Settings → Resources → Advanced, and you’ll see the resource management interface.
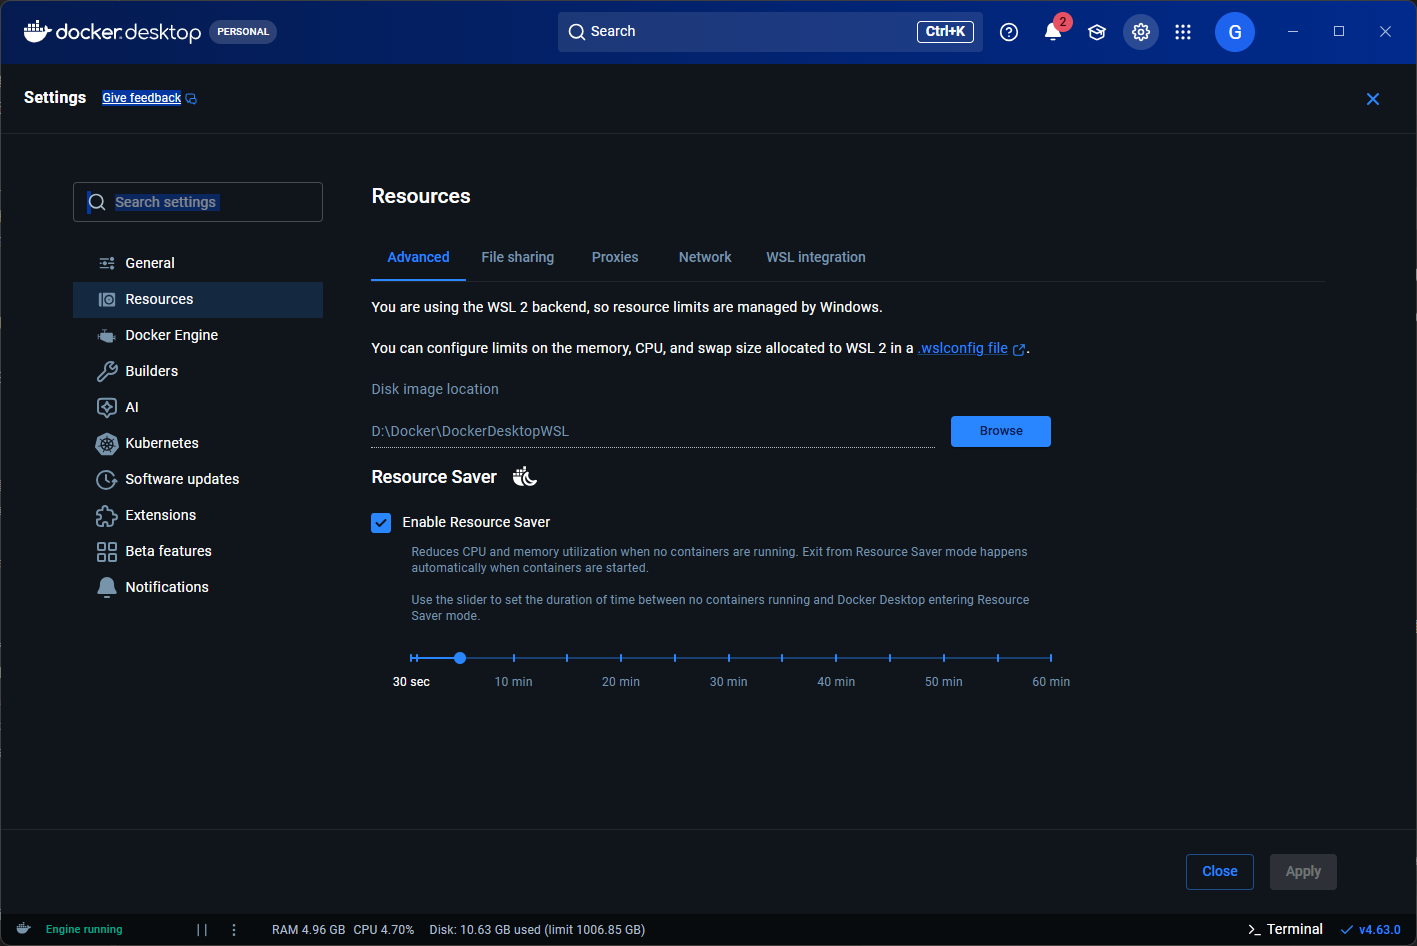
There’s a key message here: “You’re using the WSL 2 backend, so resource limits are managed by Windows”.
This means the .wslconfig we created earlier is what actually controls resources. However, this interface has some useful settings:
Resource Saver
Highly recommended to enable! Its function is: automatically reduce CPU and memory usage when no containers are running.
Setup method:
- Check “Enable Resource Saver”
- Use the slider to set the trigger time (default 30 seconds is fine)
This way, when you’re not using Docker, it won’t secretly consume resources in the background.
Step 4: WSL Integration Configuration
Switch to the Resources → WSL integration tab.
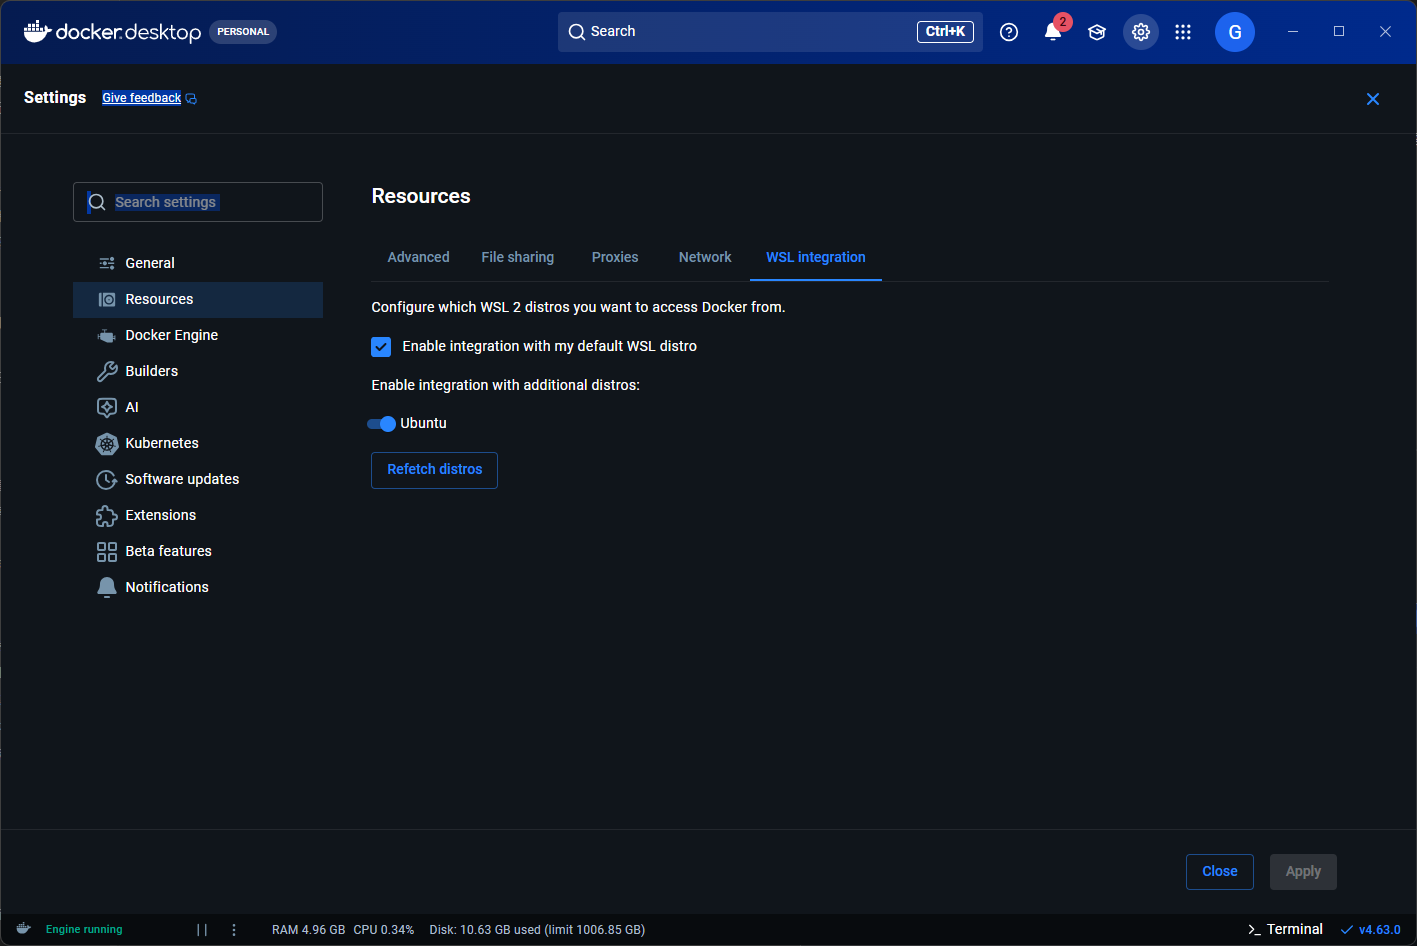
The purpose of this interface is: configure which WSL2 distributions can access Docker.
If your development environment is in WSL’s Ubuntu, you need to enable Ubuntu’s integration here. Once enabled, you can use the docker command directly in Ubuntu without installing Docker Engine separately.
Configuration method:
- Check “Enable integration with my default WSL distro”
- Select the distributions you need below (such as Ubuntu)
Performance Comparison
The change before and after optimization is very obvious:
| Metric | Before Optimization | After Optimization |
|---|---|---|
| Memory Usage | 16GB+ (system lag) | Within 12GB (smooth) |
| CPU Usage | All 12 threads | Limited to 6 cores |
| Idle Usage | Sustained high usage | Resource Saver automatically reduces |
Common Questions
Q1: Why does Docker Desktop consume so many resources?
Docker containers are essentially processes running on the Linux kernel. Windows isn’t Linux, so WSL2 is needed to simulate a Linux environment. This simulated environment has no resource limits by default, so it “eats as much as it can.”
Q2: What if Docker becomes slow after configuration?
Increase the values in .wslconfig appropriately. If you’re running many containers, you can raise the memory limit to 16GB.
Q3: How to check current resource usage?
Docker Desktop’s bottom status bar displays CPU, memory, and disk usage in real-time. You can also view each container’s resource consumption on the container list page.
Summary
The performance issue of Docker Desktop on Windows lies in WSL2’s resource limits. By creating a .wslconfig file, you can precisely control the CPU, memory, and swap space that Docker can use, combined with the Resource Saver feature, making Docker go all out when needed and stay quiet when not.
Three Core Steps:
- Create
.wslconfigto limit resources - Enable Resource Saver to save idle resources
- Configure WSL integration for development environment interoperability
Once you’ve got these sorted, your Docker Desktop will transform from a “resource devourer” to a “gentle assistant.”
Welcome to follow the WeChat Official Account FishTech Notes to exchange usage experiences!